TROUBLESHOOTING: CIRCUITRY AND CODE
GENERAL ADVICE
As you’ve probably already experienced, it can be tricky to identify and fix problems in projects that combine sewing and electronics. When you start to control your electronics with programs it becomes even harder. It’s often difficult to tell from your project’s behavior whether it’s misbehaving because of an electrical issue, like a short, or a bug in your program, like a missing digitalWrite statement.
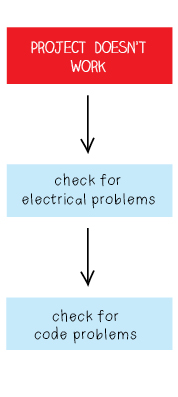
The troubleshooting pages in the rest of the book are separated into electrical diagrams that deal with circuitry and code diagrams that deal with programming. If your project isn’t working properly and you don’t know why, begin by following the electrical diagram, which will help you examine and fix your circuits. If this doesn’t take care of the problem, work through the code diagram and look for programming mistakes.
You want to make sure you fix all electrical issues before you start worrying about programming glitches so you can tackle electrical and code problems separately. If there’s a flaw in your circuitry, your project may not work even if your code isperfect. Make sure you’ve solved all of your electrical problems before you turn to code issues.
BASIC TECHNIQUES
Checking for and fixing electrical problems before you tackle programming errors is one important debugging strategy.
Here are a few more:
• First and foremost, expect to have lots of errors! You’ll almost certainly encounter several problems in every project. It’s the nature of working with electronics and programs. Focus on solving the problems and try not to get frustrated.
• Always check your entire project for errors—all of your circuitry or all of your code. Don’t assume you know where a problem is. It’s often in a place where you don’t expect it to be.
• Each time you make a change, check to see if it solved your problem. Don’t make lots of changes before you check your project or you may introduce new errors.
• When you’re looking for electrical issues, carefully follow each trace of stitching in your project. Look at the stitches on both the front and the back sides of the fabric. Look especially for loose connections around tabs and dangling threads that may be causing shorts.
• When you’re looking for electrical issues, check to see what happens when you bend, jiggle, or squeeze the project. Changes in response to movement may indicate an electrical flaw like a loose connection or a short.
• When you’re debugging your code, carefully read through your program from top to bottom, line by line. Take your time and don’t skip anything. Try to visualize what each line is doing and compare what the code is saying to the behavior of your project. If you change anything in your code, recompile it right away.
• When you’re printing information out on a computer screen (you’ll do this in the next section), watch the values carefully. Check to see if they change in response to your behavior. Look for patterns in how they change. Printouts are a powerful troubleshooting tool.