BUILD YOUR BOOKMARK
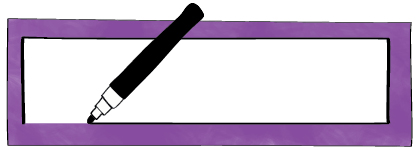
Use a pencil or a piece of chalk to trace your bookmark template onto your fabric. Cut out this shape.
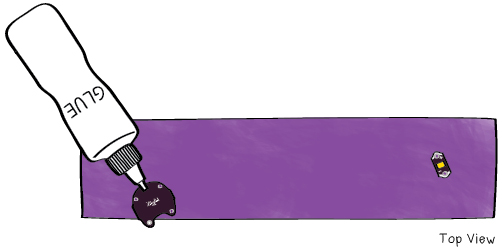
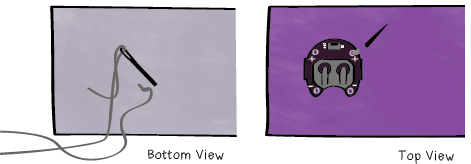
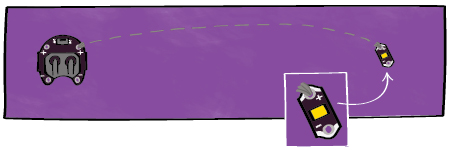
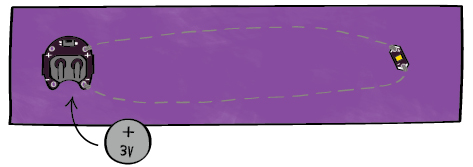
Glue the battery holder and LED to the top side of the fabric, using your design drawing as a reference. This will keep them in place as you sew. Use only as much glue as you need to attach the pieces and be careful not to fill any of their tabs with glue. You’ll need to sew through these in a moment. Note: do not put the battery in the battery holder yet. You’ll do this when you finish building your bookmark.
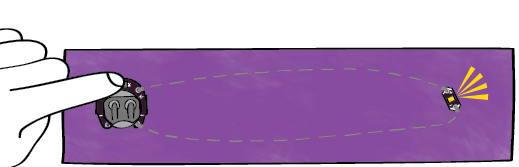
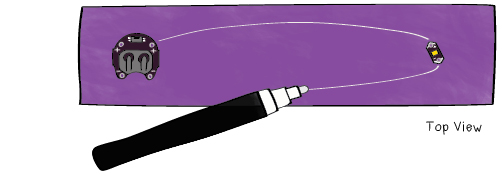
Using a piece of chalk or a pencil, lightly mark the traces that connect your battery holder and LED on your piece of fabric. This will make it easier for you to sew your connections, which you’re now ready to start stitching.
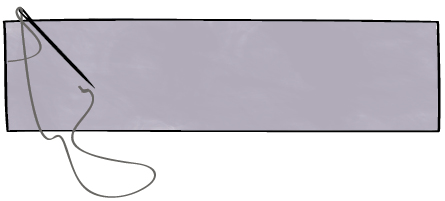
THREAD YOUR NEEDLE
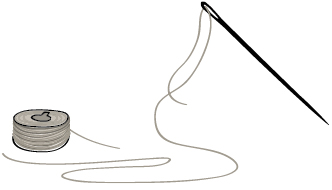
Get out your needle and conductive thread. Cut off 2-3’ (1 meter) of conductive thread and thread it through your needle. Pull conductive thread partway through the needle so that you have one long tail and one short tail coming out of the needle.
TIE YOUR FIRST KNOT
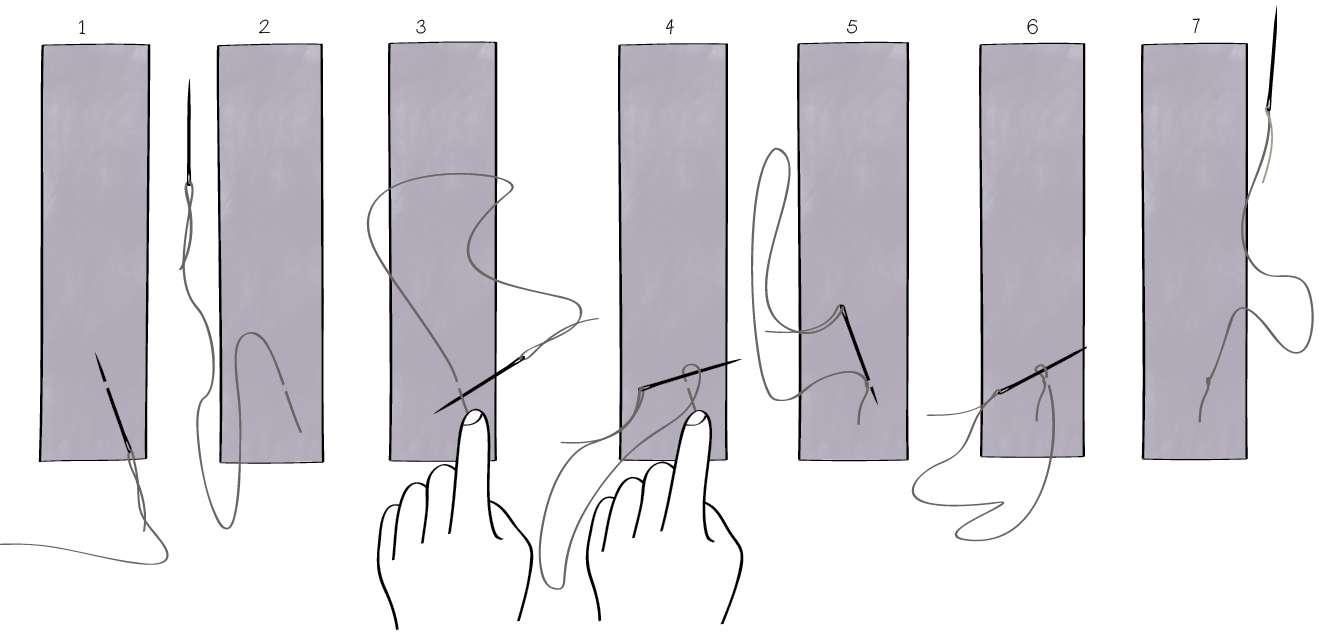
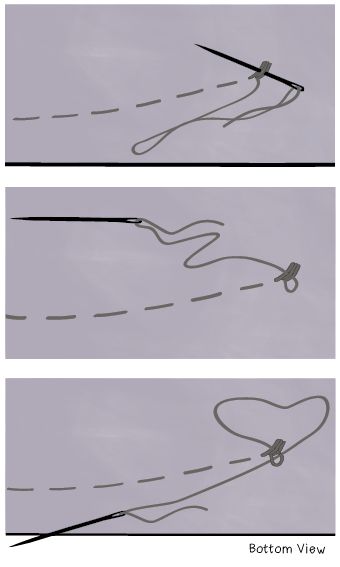
To ensure that your stitching doesn’t come undone, you need to tie your thread securely to your fabric before you start sewing. Follow along with the figures on this page and the next as you go through the steps.
- On the underside of your fabric, directly underneath one of the (+) tabs on your battery holder, sew through a small piece of fabric with your needle. Note: Don’t sew through the (+) tab itself, just through the fabric.
- Pull your needle through the fabric so that a short (approximately 1” (2.5cm) tail is left behind.
- Hold this tail with your other hand and thread the needle underneath the tail to make a small loop.
- Guide your needle back through the loop you made in step 3. Pull the needle tightly to produce a snug knot on the surface of your fabric.
- Guide your needle back through the fabric, creating a new loop.
- Guide your needle through this loop.
- Pull it tightly to produce the final knot.
(click on the image below to see it enlarged)
STITCH THE (+) TAB OF THE BATTERY HOLDER
Push your needle up through the fabric right next to the (+) tab of the battery holder. Tug on your needle to make sure you don’t leave any excess thread on the underside of your fabric.
Now, poke the needle through the (+) hole to create a loop around the (+) tab and secure the battery holder to the fabric. Pull the thread through tightly to make a snug connection between the thread and the tab.
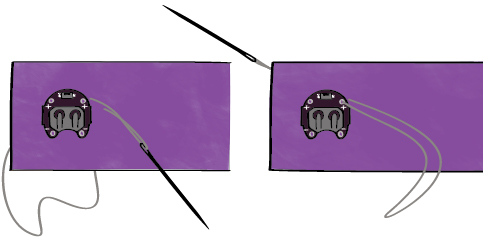
Repeat this process at least 3 times. Make sure you maintain tight contact between the thread and the tab by tugging on the thread after each stitch.
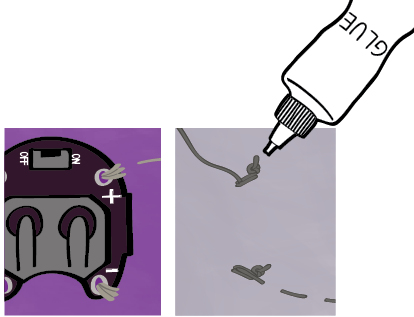
Before you move on to the next step, put a small dab of glue on the knot on the underside of your fabric to make sure it doesn’t unravel. Trim the excess thread on your knot to about 1/4” (6mm).
STITCH THE (+) TRACE
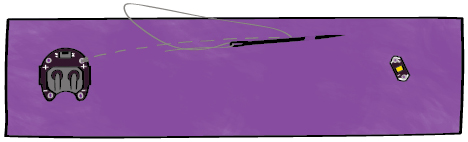
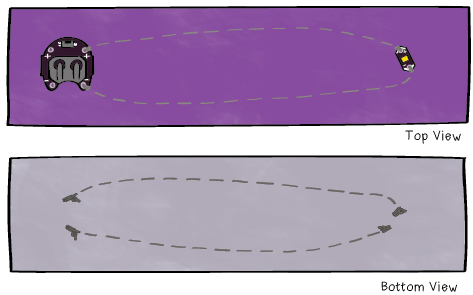
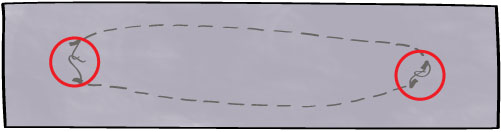
Now you’re ready to begin sewing the trace from the (+) tab on the battery holder to the (+) tab on the LED. To do this you’ll use a simple technique called a running stitch that weaves the thread between the front and back sides of the fabric.
Begin with your needle on the underside of the fabric, near the battery holder tab you just sewed. If your needle is on the front side, poke it through to the back side.
Guide your needle up through the fabric about a 1/4” (6mm) away from the battery holder to make your first stitch.
Then, sew down through the front side of your fabric another 1/4” toward your LED. Repeat this process until you reach the (+) side of your LED. You should make neat even stitches that follow the line you drew from your battery holder to your LED.
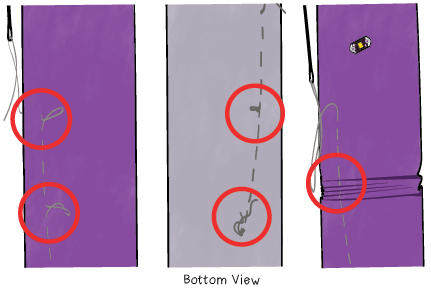
Pause every few stitches to check for loose or tangled threads. Check both the front and back of the fabric to make sure there aren’t any tangles or knots hiding on the side you can’t see. Also make sure that you’re not gathering and puckering your fabric as you stitch. If your fabric is puckered, take time to flatten it back out before you resume stitching.
Once you reach the LED, make at least 3 tight loops around its (+) tab the same way you attached your battery holder.
TIE A FINISHING KNOT
Now you need to tie a knot to complete this trace. Begin by making sure your needle is on the back side of the fabric. (You want to hide all of your knots on the back of your bookmark.) Now you’ll repeat the steps you followed to tie your beginning knot:
- Guide your needle through one of your earlier stitches.
- This will create a loop of thread.
- Push your needle through the loop. Pull on it slowly and firmly until the loop has tightened.
Repeat this process at least one more time to make a secure knot. Cut your thread, leaving behind about a ¼” (6mm) long tail. Put a dab of glue on the tail to make sure it doesn’t unravel.
STITCH THE (–) TRACE
Sewing on the (–) trace is just like sewing on the (+) trace except you’ll stitch from a (–) tab on the battery holder to the (–) tab on the LED.
Begin by tying a knot in your thread and making at least 3 tight loops around the (–) tab on the battery holder. Trim the tail on your starting knot and put a dab of glue on it to make sure it doesn’t come undone.
Then, following the line you drew on your fabric, stitch from this tab to the (–) tab on the LED, checking periodically for tangles, loose threads, and puckering. When you reach the (–) tab on the LED, loop through it snugly at least 3 times before tying a knot, cutting your thread, and securing your knot with a dollop of glue.
As you’re sewing, don’t let the (–) trace touch or come close to the (+) trace. This is particularly important in places where there are knot-ends or loose threads. When you’re finished, double check the front and back of your fabric for loose threads and long knot tails.
TEST THE CIRCUIT
The circuit is now complete and (hopefully) ready to use! You just have to test it out.
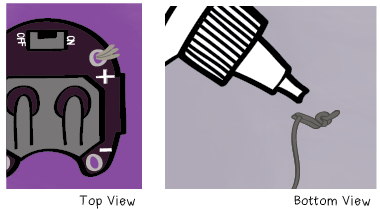
Slide your battery into its holder. The coin cell battery has a flat side with a (+) sign on it that should face up as you put it into the holder.
Flip the switch on your battery holder from off to on. Your LED should now shine brightly. If it doesn’t, see the troubleshooting section at the end of this chapter.