FINISH BUILDING YOUR PIANO
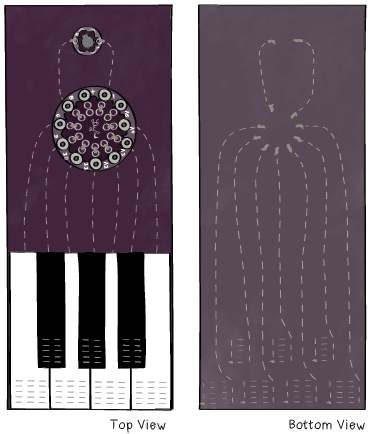
Now that you’ve got one key working, it’s time to make the remaining six. First, build the decorations for your keys (minus their conductive thread) and attach these to your piano.
Stitch out the key-sensor traces. In the example here, the keys are attached to pins 6, 9, 10, 11, A2, A3, and A4.
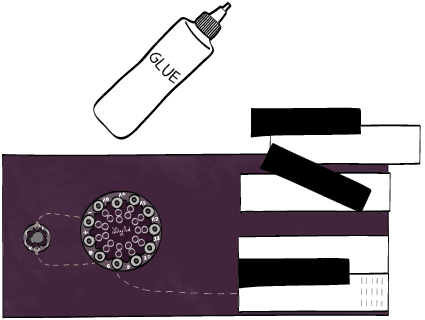
For each key-sensor, begin by tying a knot on the back of the fabric near the appropriate pin on the Protoboard. Stitch snugly through the appropriate holes in the Protoboard (at least 3 times) and then stitch from the Protoboard to your piano key. Once the key is complete, tie another knot on the back of your fabric. Trim your knots and seal them with glue before moving on to the next key.
Remember that each key must include exposed conductive thread since the exposed thread is what allows the LilyPad to detect touch.